Signature Cards
This is the third rebuild of this card system. The first version was written in pure JavaScript, The second version I build in Godot but while the resulting WebAssembly binary was graphically more complected it came at the expense of 39.5 MB of binary and 12.6 MB of pck. Significantly to large for a toy, not even factoring the assets.
This version is built entirely using Three.js and comes out to a cool 382.6 KB 😚👌
This is also the first time I have used Three.js for a project, and I am infatuated.
The basic implementation is the same as the previous two versions. Three.js uses a similar node system to most conventional game engines so the set up is almost identical to the last version. I will be using some images of version 2 when appropriate.
Implementation
<div style="width: 100%">
	<iframe src="https://tastybugs.ink/hidden/card_engine/?source=https://tastybugs.ink/hidden/card_data/me_card/data.json" style="width: 40em; height: 40em;"></iframe>
</div>
This version also handles multiple instances cleanly in addition to being a lot lighter.
I am embedding an iframe pointing to the card page and a data.json file containing the cards information.
{
  "name": "Aleq de Villiers",
  "edge_color": "#cfc884",
  "type_color": "#a5e339",
  "tag_color": "#e6d329",
  "metal": 0.9,
  "rough": 1.0,
  "type": "DEV",
  "description": "I grew up reading about fantastic technologies and lived long enough to see them become complicated reality.",
  "tags": [
    "She/They",
    "South African",
    "Linux",
    "Rust",
    "C/++",
    "C#",
    "Java/TypeScript",
    "Godot",
    "Unity",
    "Unreal"
  ],
  "layers": [
    "https://tastybugs.ink/hidden/card_data/me_card/me_tile.png",
    "https://tastybugs.ink/hidden/card_data/me_card/land_0_tile.png",
    "https://tastybugs.ink/hidden/card_data/me_card/land_1_tile.png",
    "https://tastybugs.ink/hidden/card_data/me_card/land_2_tile.png",
    "https://tastybugs.ink/hidden/card_data/me_card/land_3_tile.png"
  ]
}
The data.json being loaded in is straightforward. Image layers are loaded in by url and some basic attributes are exposed for chrome edging.

Structurally the cards are still constructed the same way. We start with multiple layers, and then apply a stencil buffer to clip some layers; hiding the edges with the remaining layers.
One major difference with this version is that I am drawing the card mask and content when the page loads; to save bandwidth.
// --- Draw card frame ---
const frame_canvas = document.createElement('canvas');
const frame_ctx = frame_canvas.getContext('2d');

frame_canvas.width = 1024;
frame_canvas.height = 1024;
frame_ctx.fillStyle = "black";
frame_ctx.fillRect(0, 0, 1024, 1024);

frame_ctx.strokeStyle = "white";
frame_ctx.lineWidth = 6;
frame_ctx.beginPath();
frame_ctx.roundRect(frame_left, frame_top, frame_width, frame_hight, [16])
frame_ctx.stroke();

const frame_texture = new THREE.CanvasTexture(frame_canvas);
In this sections I am drawing the frame mask.
Thee.js makes setting up a stencil buffer as straightforward as Godot. When I create my renderer I enable the stencil buffer. There is only one buffer but I am creating a variable to track it anyway.
const renderer = new THREE.WebGLRenderer({
	stencil: true,
	antialias: true
});

...

let stencil_ref = 1;
Then I tell my portal material to write to the stencil buffer and pass in my reference.
const portal_material = new THREE.MeshStandardMaterial();
...
portal_material.stencilRef = stencil_ref;
portal_material.stencilFunc = THREE.AlwaysStencilFunc;
portal_material.stencilZPass = THREE.ReplaceStencilOp;
Finally when setting up my layer materials I tell them to mask against the buffer I just wrote to; with our reference.
const layer_material = new THREE.MeshStandardMaterial();
...
layer_material.stencilWrite = true;
layer_material.stencilRef = stencil_ref;
layer_material.stencilFunc = THREE.EqualStencilFunc;
And that is it. I construct the card using multiple quads based on the data passed in at load and add it to the scene.
// --- Spawn card object ---
const plane = new THREE.PlaneGeometry(2, 2);
const card_root = new THREE.Object3D();

const text_mesh = new THREE.Mesh(plane, text_material);
card_root.add(text_mesh);

const edge_quad = new THREE.Mesh(plane, edge_material);
card_root.add(edge_quad);

const portal_quad = new THREE.Mesh(plane, portal_material);
portal_quad.position.set(0, 0, -.001);
card_root.add(portal_quad);

for (let i in card_data["layers"]) {
  const url = card_data["layers"][i];

  const layer_material = new THREE.MeshStandardMaterial();
  layer_material.opacity = 0;
  layer_material.transparent = true;
  layer_material.stencilWrite = true;
  layer_material.stencilRef = stencil_ref;
  layer_material.stencilFunc = THREE.EqualStencilFunc;

  loader.loadAsync(url).then((texture) => {
    layer_material.map = texture;
    layer_material.opacity = 1;
    layer_material.needsUpdate = true;
  })

  const layer_quad = new THREE.Mesh(plane, layer_material);
  const layer_scale = 1 + .1 * i
  layer_quad.position.set(0, 0, -.1 -.1 * i);
  layer_quad.scale.set(layer_scale, layer_scale, layer_scale);
  card_root.add(layer_quad);
}

scene.add(card_root);
Creating Your Own Cards
If you want to create your own cards to host on your own website, you might have guessed, that is straightforward.
First of all you are going to need file hosting. Layers are loaded remotely, you can host your own images and data files as a subdirectory of your website and then point to it in a similar manner as above.
<iframe src="https://tastybugs.ink/hidden/card_engine/?source=[your data file url]" style="width: 512px; height: 512px;"></iframe>
You can also download and host the files yourself. There are only 4 files you need in addition to your asset files.
| Description | Link (right-click save) |
|---|---|
| The main js file | three_card.js |
| The end-point index file | index.html |
| Fallback texture |  |
| Noise texture | 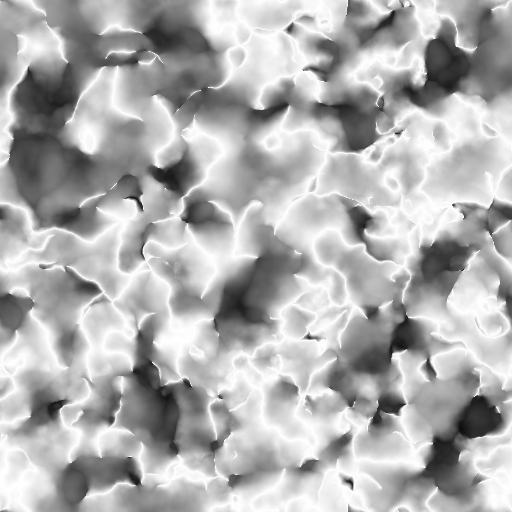 |
Place these files in their own subdirectory of your website or file hosting service and point to it in the same way as before.
<iframe src="[Your end-point]?source=[your data file url]" style="width: 512px; height: 512px;"></iframe>
The noise texture can be replaced to create different texture effects.
Layer Textures
Layers should be layed out with the focal object in the centre third of the image and need to be 1 by 1 images to fit the card mesh, any scale will work it's up to you. I used 1024px by 1024px images. You can use as many layers as you want; there is no hard limit.